CHROMA KEY NOTES / 001
Why a Green Screen Remover Fails: Symptoms, Causes and Fixes
A green screen remover fails because it deletes one specific color, while a real photograph contains hundreds of slightly different greens. Nearly every bad cutout traces back to the capture, not the slider: uneven lighting, bounce light on the subject, a wrinkled backdrop, or a subject that shares the key color. Fix the light and sample the actual backdrop color first; if the backdrop is not a flat solid color, no amount of tolerance tuning will produce a clean edge.
Open the green screen remover ↗
The one thing a color key actually does
A color key is a distance test. For each pixel it measures how far that pixel sits from a chosen key color, and makes it transparent when the distance falls under a threshold. That is the whole mechanism. It has no idea what a person, a product, or a hair strand is; it cannot tell the difference between "background green" and "a green label on the box in the foreground". This is why the tool on this site gives you three controls and nothing else: a key color (including a sampler that reads a pixel straight from your image), a tolerance that sets the distance threshold, and an edge softness that feathers the boundary of the pixels being removed.
Everything else people expect from a green screen remover, such as removing wrinkles, restoring natural skin tone, separating a white product from a white background, or producing a transparent video, lives outside that mechanism. Understanding the boundary saves more time than any preset. A useful mental model is that the tool answers exactly one question for every pixel: "Is this pixel close enough to this color?" It never asks "Is this pixel part of the background?"
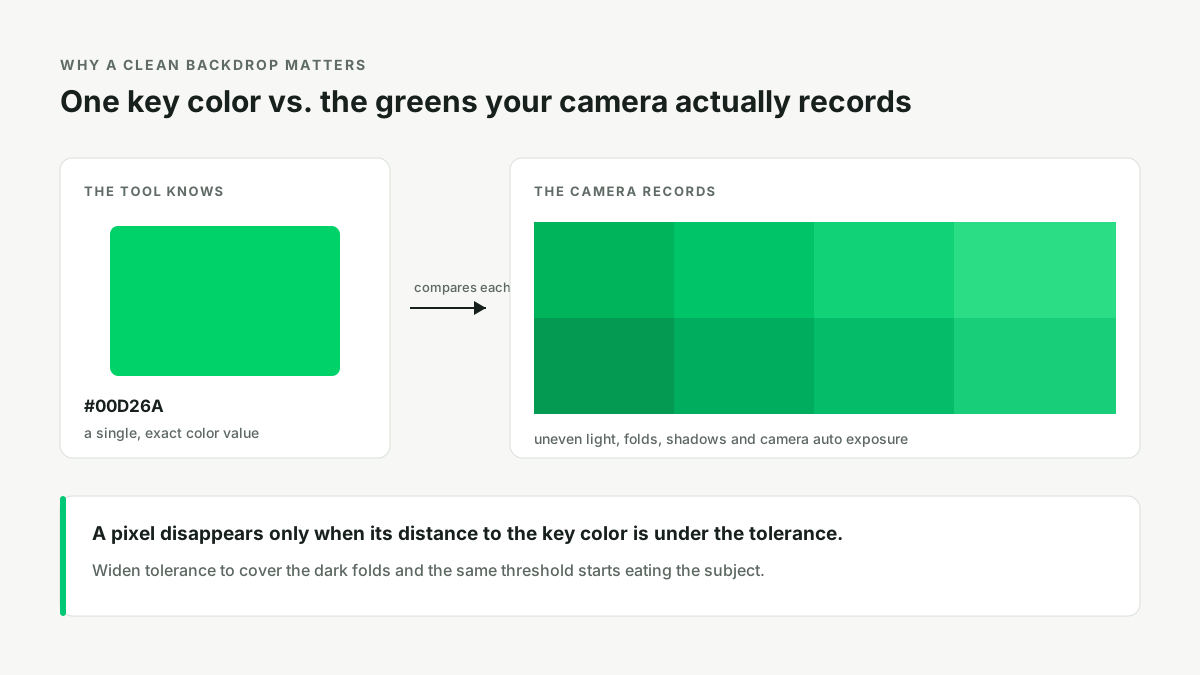
Symptom, cause, and whether a slider can fix it
The table below is built from failure reports people posted while trying to key real footage and stills on different software. The symptoms repeat across tools because the cause is in the source image, not in any particular product. The last column is the important one: it tells you when to stop adjusting and either reshoot or switch method.
| Symptom | Actual cause | Fixable here? |
|---|---|---|
| Patches of green remain in the corners | Uneven lighting produces several distinct greens across the backdrop | Partly — sample the dominant area and widen tolerance slowly |
| Only a few pixels turn transparent | Key color is a preset that does not match the photographed green | Yes — use the sampler on a background pixel |
| Holes appear inside the subject | The subject contains the key color or a color very near it | Partly — narrow tolerance, or choose a different key color |
| Hair and fur look jagged or vanish | Semi-transparent edge pixels blend foreground and backdrop | No — needs alpha matting or manual edge work |
| Subject has a green or grey halo | Bounce light tinted the subject; the key removed pixels but not the tint | No — needs spill suppression and color correction |
| Glass, smoke, or reflections disappear | The backdrop color is visible through the subject | No — a color test cannot separate them |
| Tracking markers or a stand are still there | They are not the key color | No — needs masking or retouching |
| Edges look crunchy and pixelated | Edge softness set to zero on a low-resolution source | Yes — a small amount of feathering helps |
| Edges look blurry and eaten away | Tolerance too wide; it started removing foreground pixels | Yes — back the tolerance down |
| Download has a black or white background | The viewing app is rendering transparency, or the file was re-saved without alpha | Not a keying problem — check the file format |
| Result differs between frames of the same shoot | Auto exposure or auto white balance changed the recorded green | No — lock camera settings and reshoot |
| Huge image stalls or crashes the tab | Browser canvas memory, not the algorithm | Yes — downscale the input first |
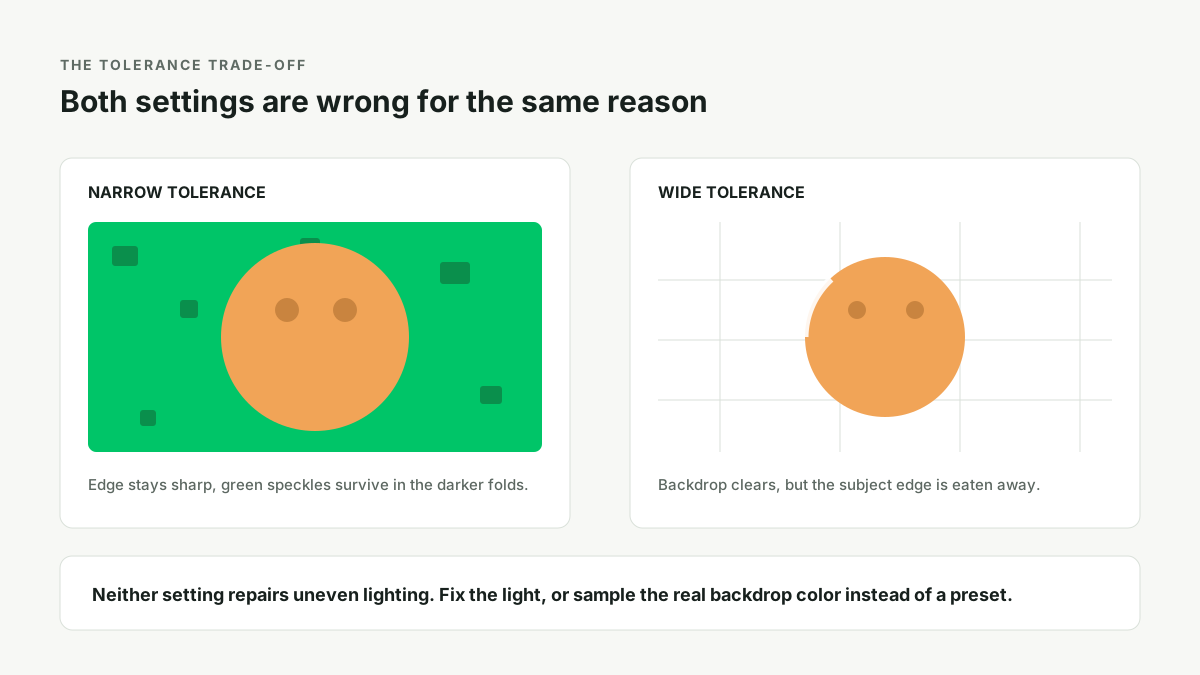
Three failures you cannot fix with a slider
Bounce light on the subject
One photography question describes the exact situation: "It was evenly lit, but between the light and the green, the color reflected on his head." Another editor, after keying the backdrop cleanly, found that "the people in the shot still have streaks of green light across their clothes and bodies". In both cases the key did its job perfectly. The green is no longer in the background; it is in the subject's own pixels. Deleting a color cannot reconstruct the original skin tone underneath it. The practical fix is physical: move the subject further from the screen, flag the bounce, and light the subject separately. If the tint is already baked in, a selective desaturation limited to the affected hue is the only post-production option.
"It was evenly lit, but between the light and the green, the color reflected on his head."Photographer, chroma key reflection question on Graphic Design Stack Exchange
An uneven or textured backdrop
A short-film crew put it plainly: "Unfortunately the green screen was uneven causing different shadings on the background." Someone else was working with "just a piece of canvas painted green". A hand-painted or creased surface is not one color, it is a family of colors with brightness gradients across every fold. Raising tolerance to cover the darkest fold inevitably reaches into the subject. This is also why a grass field makes a poor screen: the color varies leaf by leaf and the texture moves. If the backdrop is not reasonably flat, the honest answer is to reshoot or to use subject segmentation instead of a color key.
Leftovers that are not green
"I have easily remove the green screen but I am unable to remove tracker points from it." That report captures a whole class of disappointment. A color key only knows the key color. Tracking markers, a visible stand, a cable, or a black border are all foreground by definition and will survive. So will a green logo on a product, which is foreground by geometry but background by color, and will be punched out. Both need a mask or a retouch pass, not another tolerance adjustment.
A five-minute diagnostic routine
Rather than guessing, run the same four checks on every source image before you touch the sliders. This routine uses only the controls this tool exposes, and it tells you in under five minutes whether the image is worth keying at all.
- Sample four corners. Use the eyedropper on a background pixel near each corner and note the hex value. If the four values differ substantially, the backdrop is not evenly lit. Widen tolerance only as far as the spread demands, and expect some residue.
- Compare the subject to the key color. Look for clothing, packaging, or props close to the sampled hex. If they exist, decide now whether a different key color (blue, or a custom solid backdrop color) is safer.
- Start narrow. Set tolerance low, then increase in small steps until the backdrop clears. Stop at the first moment the subject's edge starts to thin. That stopping point is the useful ceiling, not the maximum on the slider.
- Feather last. Add only enough edge softness to hide the staircase on diagonal edges. Too much softness reads as a blurry halo on light backgrounds.
- Check the export over a checkerboard. If the checkerboard shows through, the PNG has real alpha and any black or white you see elsewhere belongs to the destination app, not this page.
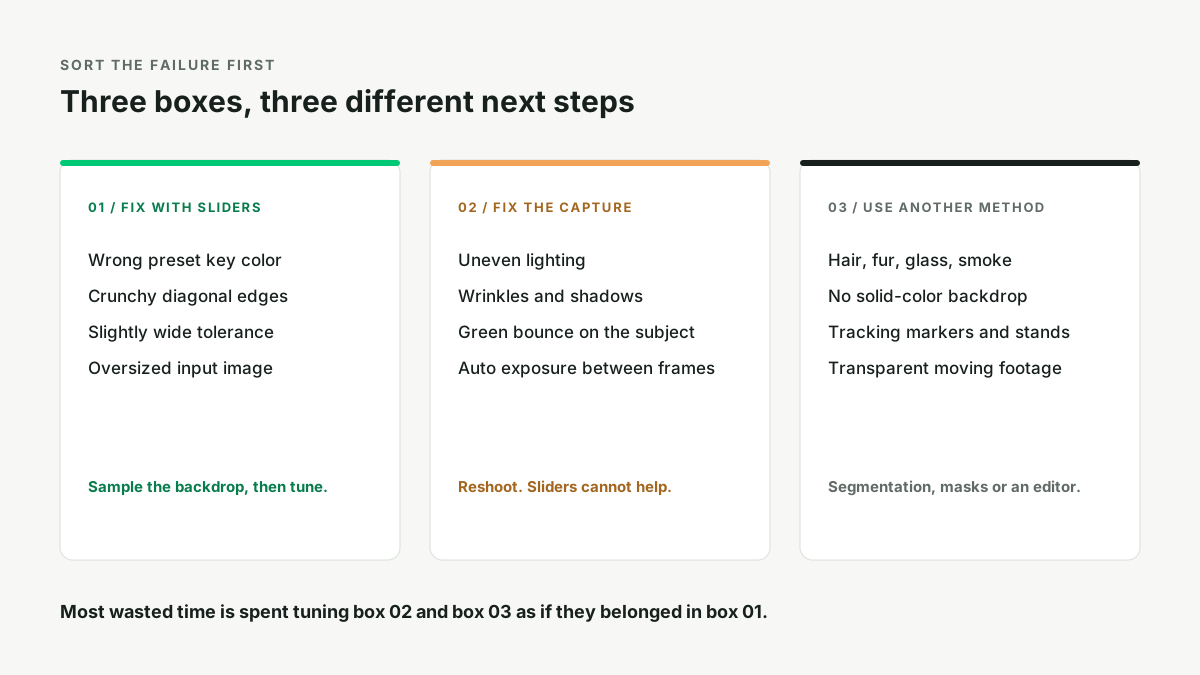
What this tool deliberately does not do
This page runs entirely in your browser with the Canvas API and returns a transparent PNG. It does not upload images, it does not perform AI subject segmentation, and it does not export transparent video. The last point is a format constraint rather than a missing feature: the common web video codecs carry no alpha channel, so a genuinely transparent moving image needs a different container or a PNG sequence. One editor ran into exactly this while exporting frames and found "the PNG are appearing with a black background"; elsewhere the blunt answer is simply that "H.264 does not support alpha". If your source is footage with a complicated or uneven backdrop, a video editor with spill suppression is the right tool. If it is a single still with a flat, evenly lit solid-color backdrop, three sliders are enough.
Being explicit about the boundary is more useful than pretending otherwise. A color key is a fast, private, precise instrument for a narrow job. Most of the frustration people report comes from asking it to do a different job.
Questions people actually ask
- Is lighting a green screen necessary?
- Yes. Even lighting is the single biggest factor in whether a color key works, because a chroma key removes one color, not a range of shades caused by shadows. Light the screen separately from the subject, keep a metre of distance, and pull the wrinkles out before shooting.
- How do I deal with color spill in chroma key?
- Prevent it at capture time. A color key cannot reconstruct skin or fabric that green light has already tinted. Increase subject-to-screen distance, flag the bounce, then apply a selective hue adjustment to the affected edge band if the tint is already baked in.
- Would a large grass field make a good green screen?
- No. Grass is not a single color, and it moves. Texture, wind, and varying saturation leave holes and speckle across the frame. Use a physical screen or subject segmentation for outdoor footage.
- Why do my PNG sequences appear with a black background?
- Either the export did not include an alpha channel, or the viewer is drawing transparent pixels as black. Open the file in an editor with a checkerboard: if the checkerboard shows, the PNG is fine and the problem is downstream.
- My client wants a JPEG with a transparent background. Can I do that?
- No. JPEG has no alpha channel and always fills transparency with a solid color. Deliver PNG or WebP with alpha; if the platform insists on JPEG, flatten onto the required background color first.